

Shoot in RAW, Always!
I had wanted to write this article about six months ago, just to warn you about a practical experience that I have learned back then. I couldn't write it before, because it would have made my secret project (see later) known to the world. So now that I'm actually writing this article, I feel like a ton of weight has been lifted from my shoulders.
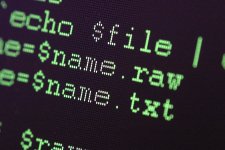
Being a Computer Scientist, I have been taught that data is significantly more important than the tools used to manipulate them. So when I shoot fine art photographs, I always shoot in the highest resolution, lossless compression mode. And if a camera supports the sensor RAW mode, I always shoot in RAW mode. The highest resolution, loss-less compression mode (such as TIFF or RAW) provides the most amount of data, therefore the pictures has the highest potential for future use.
However, some people have given the advice that you should shoot at the resolution you need for a particular project. And the advice is to shoot in the lossy compress mode (such as JPEG), if it is sufficient for the work, to save storage space and processing time. These people came up with ways on how you can determine the final picture size you need (such as determining your printer's PPI and the size of print your want to make). The advice they given is very practical and almost common sense. Even so, a small voice in the back of my mind constantly nags at me, telling me that this practical advice is wrong! The little voice tells me that data is significant.
When I started down the path of developing this web site, I weighted the decisions to follow my Computer Science preaching or to exercise the more practical advice. After writing a few articles and posting them, the practical advice won out. It took time to process my 3 megapixel Canon EOS D30 RAW files into TIFF files. And each RAW file and TIFF file combination took up ten megabytes of space. Then I would down-sample the TIFF file to a resolution of 450x300 pixels JPEG image for display on the web page. Why not just shoot at the lowest JPEG resolution from the start?
So that's the way I went about designing this web site. I shot all the pictures in low resolution JPEG mode and down-sample them to 450x300 pixels for the site. Still, the little voice would nag at me and I would simply ignore it. My excuse to ignore the little voice was that I would never need the full resolution images. My web site development continued for seven years in this manner.
October 2004 rolled around and the Executive Editor of a well-known publishing company contacted me. The editor had found my web site. He said that the publishing company wanted to do a book on camera hacking. The book would include some of the contents on my web site and include many new hacking ideas that were swirling around in my head. I was, of course, very excited to have this opportunity and jumped on the offer immediately. I had tons of ideas that I just haven't had time to writing them down on this site. This book would be the perfect motivator to work out those hacks.
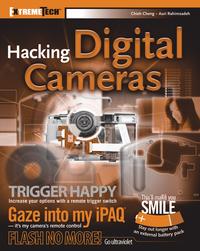
This book, Hacking Digital Cameras, is the secret project that I have been alluding to here and there through out my web site since last October. And it is because of this secret project that I couldn't write this article till now.
When we first started the project, the editor sent me the artwork and figure guideline for the book. It turned out that all of the photographs for this book had to be shot in high-resolution (2 megapixels) and in lossless image format (TIFF, PNG, BMP, etc). Lossy JPEG images must be at least 3.2 MP in size, but is undesirable to the publisher. That's when my heart sank, because I had already shot hundreds of photographs for this web site. These photographs were all shot in lossy JPEG format. And a lot of these photographs would take a tremendous amount of work to re-shoot. Because each photograph is a step in the hacking process, re-shooting the picture means performing the hack again. Some of the hacks are irreversible. Some of the equipment I had then are now long gone.
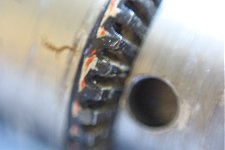
Luckily, only several articles on my web site were going to be in the book. Out of a 500 pages, 30 or so chapters book, the web site articles comprised only a few chapters. I was able to re-shoot those photographs. From the moment we started the book project, I realized that the little voice in my mind has been right all along. Data is significant! And the highest resolution, uncompressed image is best. An image quality compromise shouldn't be made for any project. I've learned my lesson.
Tip
Your camera doesn't support RAW mode? You can scour this site, the web, and the HDC book to see if a RAW-enabling hack is available. No RAW-enabling hack for your camera? Shoot at the highest resolution and highest quality mode. By doing so, you ensure your picturess has the highest potential for future use.
You could probably argue that there is no reason for you to follow my advice in this article, because there is no potential for your photographs to be published. Unfortunately, I have never thought that my web site photos will ever be published either. I had intended for the pictures on this web sites to be view on the web, not published in a book. Point is, you won't really know whether your pictures will have the potential or not. But if you ever think there is the slightest chance that your pictures will be used professionally, shoot it in RAW format. Don't worry about the people that claim JPEG format is sufficient and ridicule you for shooting RAW. In time, they will learn as I have.
Related Links
Related Links
- Camera Raw with Adobe Photoshop CS - Amazon User Reviews
- Canon Digital Photo Professional - Free workflow and RAW conversion software for EOS 1D-series owners.
- Hacking Digital Cameras - Amazon User Reviews
- JPEG, TIFF, or RAW \x{2026} Which Should I Use?
- Raw Capture, Linear Gamma, and Exposure
- Shooting RAW: Streamlining Your Workflow
- Understanding Digital Raw Capture
- Understanding Raw Files
- Understanding RAW Format
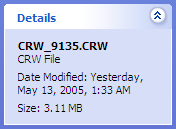
- Viewing Camera RAW Thumbnails in Windows Explorer - Viewing Canon Raw .CRW and .THM file extensions in Windows Explorer
- Why You Should Shoot RAW
276 Users Online
|
Get Our
$10000-above $5000-$9999 $2000-$4999 $1000-$1999 $500-$999 $200-$499 $100-$199 $50-$99 $25-$49 $0-$24 Gift Certificate 
|
|