![]() Attach
|
Attach
|
![]() Edit
|
Edit
|
![]() Revisions
Revisions
![]() Related Content
Related Content
Installing the Silver Sony PlayStation 2 EyeToy Camera on Windows XP Computer
The Sony EyeToy webcam for PlayStation 2 has some nice features on it: wide-angle lens attachment, built-in microphone, and a stylish finish. It's no wonder that it is so desirable to use it on a desktop or notebook computer. The silver version, model SCEH-0004, works extremely on a Windows XP system after finding and installing the right driver. The rest of this document will show you step-by-step procedure of installing the Eye Toy driver on your Windows XP system.
Getting the Driver
First thing to do is to download the driver. The driver is available as a ZIP file here: Eye Toy Driver for PC.zip. After downloading the ZIP file, extract the content. You can double click on the ZIP file to see the content. Drag the internal folder onto your Windows Desktop.
Note
This driver has only been tried with the silver Eye Toy SCEH-0004 on Windows XP. Haven't tried it with other version of the Eye Toy, nor other versions of Microsoft Windows. If you try it, please let us know if it works.
Installing the Driver
Now it's time to install the driver. To initiate the driver installation, plug the Eye Toy into the USB port of your Windows XP computer (while the computer is on). Windows XP will automatically detect that you have plugged in a new device. It will bring up the "Found New Hardware Wizard" as shown in the screen shot below. When it asks you, "Can Windows connect to Windows Update to search for software?" Answer by selecting "No, not this time" and click the "Next >" button.

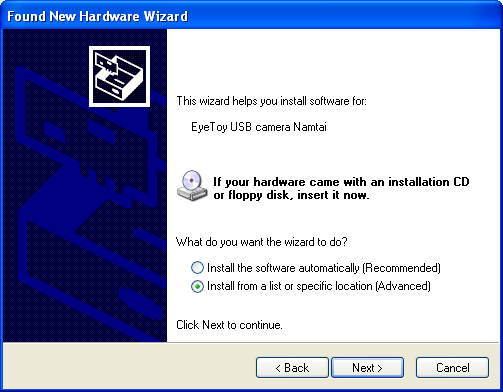
The "Found New Hardware Wizard" will detect that you've plugged in the "EyeToy USB camera Namtai", shown in the screen shot below. It will ask whether it should install the software automatically. Select install from a list or specified location (Advanced). Then click "Next >" button to continue.
The wizard will ask you where to look for the driver. Select "Search for the best driver in these locations. Then uncheck "Search removable media (floppy, CD-ROM...)". Instead, check "Include this location in the search:". Use the "Browse" button to find the folder that you extracted from the driver you downloaded. The screen shot shows an example of the selection dialog final output. Push the "Next >" button to continue.

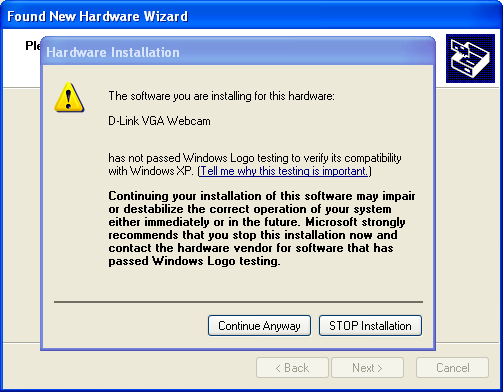
The wizard will then attempt to find the right software and install it. Don't be alarmed when it tries to install the "D-Link VGA Webcam" driver as shown in the screen shot below. That's the right one for the Eye Toy.

The wizard will prompt you with a warning dialog as shown below. You have to click on the "Continue Anyway" button to install the driver.
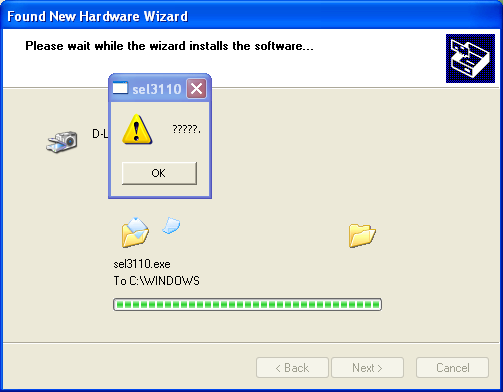
Then all of a sudden, it will present you with a strange "sel3110" dialog box (see screen shot below). It contains an exclamation icon and a bunch of question marks. The question marks are probably un-display-able Unicode for another language. The only thing you can do is to press the "OK" button.
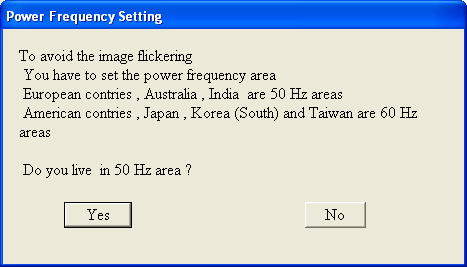
Next, you will be prompted with the "Power Frequency Setting" dialog as shown in the screen shot below. If you live in European countries, Australia, or India, then click on the "Yes" button to continue. If you live in American countries, Japan, South Korea, and Taiwan, then click on the "No" button. If your country doesn't show up on this list, then you need to figure out if your country's power outlet is on 50 Hz cycle or 60 Hz cycle.
Tip
Don't know your country's power frequency? Try one of the option. If you get image flickering, you can always uninstall the driver through the "Device Master" and then perform this installation procedure again.
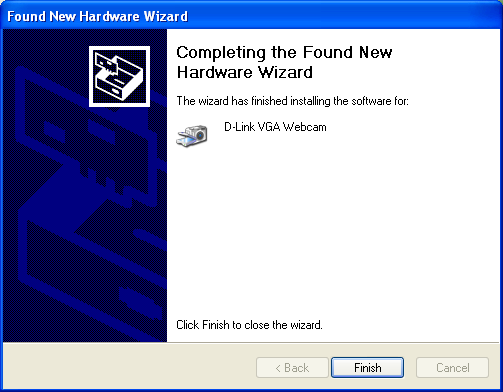
Now you are done. The wizard will prompt you to finish the installation as shown in the screen shot below. Click on the "Finish" button to complete the process. You can now enjoy using your new computer web cam and microphone.
![]() Attach
|
Attach
|
![]() Edit
|
Edit
|
![]() Revisions
Revisions
![]() Related Content
Related Content
Attachments
- 01 - Found New Hardware Wizard.png (15 KB)
- 02 - EyeToy USB camera Namtai.png (16 KB)
- 03 - Please choose your search and installation options.png (15 KB)
- 04 - Please wait while the wizard installs the software.png (11 KB)
- 05 - Warning Dialog.png (17 KB)
- 06 - Question Marks.png (17 KB)
- 07 - Power Frequency Setting.png (9 KB)
- 08 - Completing the Found New Hardware Wizard.png (14 KB)
- EyeToy Black & Silver PC Drivers.zip (1 MB)
279 Users Online
|
$10000-above $5000-$9999 $2000-$4999 $1000-$1999 $500-$999 $200-$499 $100-$199 $50-$99 $25-$49 $0-$24 Gift Certificate |
|


