
![]() Attach
|
Attach
|
![]() Edit
|
Edit
|
![]() Revisions
Revisions
![]() Related Content
Related Content
Gimp by Example: National Geographic Filter
Looking for a way to make your photographs stand out like the spectacular ones in the National Geographic magazine? Look no further than the National Geographic filter for Gimp. It can deliver the high-contrast, high-impact that will make your picture stand out.
The National Geographic Gimp script is not included with Gimp, but it's a free download. See "Related Links" below to download and install this filter. Perform the following steps to give apply the filter to your photographs:
- Load your photograph in Gimp.
- Pull-down the "Filters" menu.
- Select the "Generic" sub-menu.
- Click on "National Geographic".
- Adjust the setting as you wish. If it's your first time, try sticking to the defaults.
- Click the "OK" button.
Example
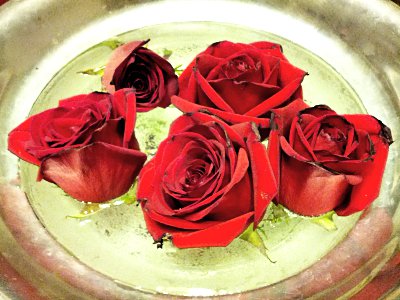
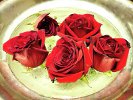
The following is a photo of floating rose buds, before applying the National Geographic filter.

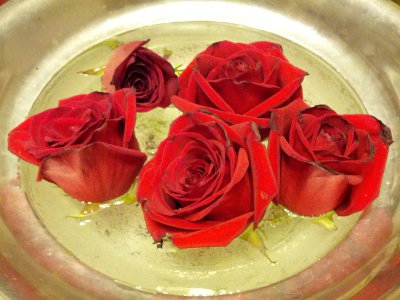
Using the default National Geographic settings of Gimp renders the following photograph.

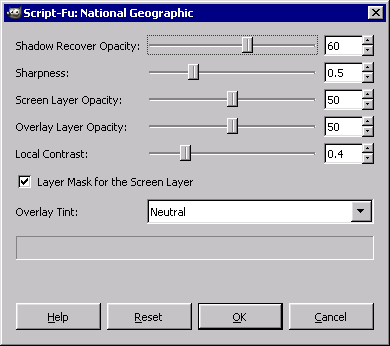
Default National Geographic Settings
The following screen shot shows the default Technicolor 2 settings to produce the example picture shown above.
Extra Credit
Download the original floating rose buds photograph above. Try different National Geographic settings on the original photograph.
Come up with an interesting example? Share (by attaching) the example photograph and a screen shot of the National Geographic settings you used.
Related Links
![]() Attach
|
Attach
|
![]() Edit
|
Edit
|
![]() Revisions
Revisions
![]() Related Content
Related Content
Attachments
- Floating Roses - Post National Graphic Filter Example.jpg (45 KB)
- Floating Roses - Pre National Graphic Filter Example.jpg (37 KB)
- National Geographic Default Values.png (5 KB)
- Thumbnail.jpg (10 KB)
340 Users Online
|
Get Our
$10000-above $5000-$9999 $2000-$4999 $1000-$1999 $500-$999 $200-$499 $100-$199 $50-$99 $25-$49 $0-$24 Gift Certificate 
|
|


