

Building a Bicycle Camera Mount
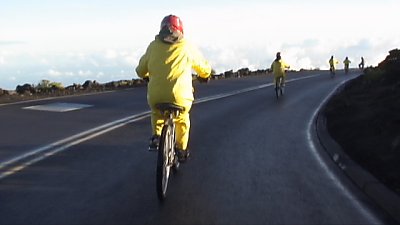
Hawaii has been one of those wonderlands that I have always dreamt about, but never thought I'd ever go. That changed when my wife and I recently made a decision to take a Contiki Adventure Tour to Hawaii in late summer this year. The Contiki Adventure Tours are restricted to 18 to 35 years olds with tons of physical activities throughout the day and nightlife in the evenings on Hawaii, Maui, Oahu, and Niihau. Physical activities includes touring an active volcano, surfing at the beautiful beaches, snorkeling at the coral reefs, and mountain biking down Mt. Haleakala Volcano after sunrise. My girlfriend (now wife) went on this trip a year ago and her stories had made my mouth water with envy.
The activity that really stood out for me is the mountain biking, though I can't wait to participate in the others as well. And for weeks now, I have said to myself that I want to make a bike camera mount so that I can videotape the fast ride down the mountain. I'm sure it will be exhilarating fun!
So I have about 60-days to make myself a bicycle camera mount. Making a mount really wouldn't be that hard or time consuming. It's just I have tons of chores to accomplish in my daily routine. And finding time to sit down and put together my vision is the hard part.
I have spent quite some time thinking of a simple way to make and use a mount. It'll have to be small enough to not intrude on other fellow bike riders. It should be quick to attach and remove from the bike to prevent the tour group from waiting on me; translates to using minimal tools or none at all. Cheap enough so that if I left it on the bike, I wouldn't feel like I lost a limb. It needs to be sturdy enough to support a small MiniDV camcorder.
My plan and concept has already been thought up, minus a few minor details that I am sure they could be worked out once I have a drill in hand. I believe the plan would meet all requirements listed in the previous paragraph. For now, I present you some pictures and parts that will fit in my master plan and see if you could devise what my plan is.
Parts You Need
- 1/4"-20 x 3" Screw
- 1/4"-20 Wing Nut (3)
- 1/4" x 1-1/4" Flat Washer (2)
- Super Glue or Epoxy
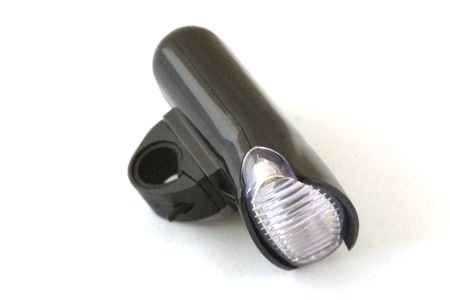
- Imitation Bicycle Headlight
I bought this bicycle headlight (see picture below) at the local 99 cents store. Guess for how much? It's a knock-off the original Cat Eye Bicycle Headlight that I paid $30 for when I was in high school. The more recent Cat Eye headlight it resembles is the Cat Eye HL-500 Bicycle Headlight. If you can't find an imitation one for a buck or so, you can always pay a little more for the real thing to hack.
|
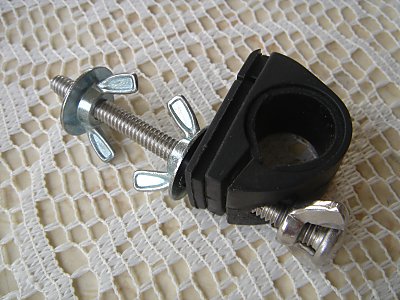
Alternative Parts I found some wing nuts with built-in washers (see picture below) in an Ace Hardware store in Hawaii. These wing nuts are more robust than the ones we'll build in this article. And you won't have to fuss with glues, etc. But the surface area isn't as big. For small camcorders or cameras, these are fine. But if you want to attach large camera rigs, you'll have to build sturdy ones out of large washers. 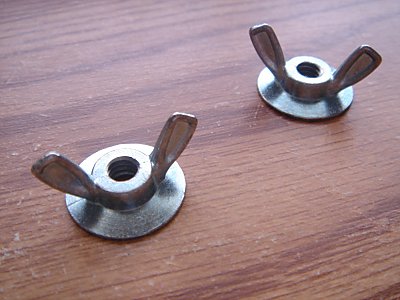
I also purchased a 1/4"-20 x 4" screw in Hawaii just in case. See, I didn't have a bicycle to test my mount with before I left for Hawaii. It's better to have all the parts you need, rather than going on the bike ride only to find out that the parts you have aren't sufficient. |
Tools You Need
- Drill
- 1/4" Drill Bit
The Hack!
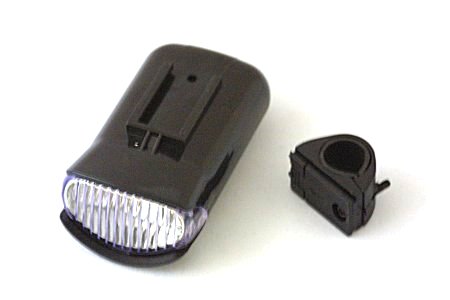
The bicycle mount portion of the light consists of four pieces: a screw bolt for tightening the mount, a plastic removal clip, a handlebar mount, and a non-slip rubber. Unscrew the bolt with a Phillips screwdriver. You'll notice that the bolt is held with a metal nut that is permanently embedded in the plastic mount. The bolt is no longer necessary, so you can toss it in the trash bin or save it in your bolt collection for future projects.
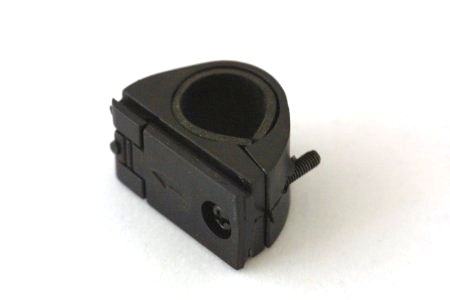
The tripod mount bolt on the camera is 1/4"-20, so you'll need to enlarge the screw hole to 1/4". This can be done easily with an electric drill and progressively drill from a smaller drill bit to the 1/4" drill bit. I used the 1/4" drill bit to make the hole as large as possible, because I wanted to the 1/4" bolt to slide though it easily. I don't want to waste too much time fiddling with the mount in Hawaii.
|
Don't Play with Fire The first thing that I tried was to remove the metal nut from the plastic mount. Instead of drilling it out, I thought it might be easier to heat the metal nut, melt the rubber, and push it out (see picture below). So I gotten a lighter and heated the metal and surrounding plastic. It didn't work. All the fire did was made the nut and bolt hot and defaced the plastic on the mount. Removing the nut by melting the plastic turned out to be a lot of work. I found out later that the metal nut was soft and took hardly any time to drill. 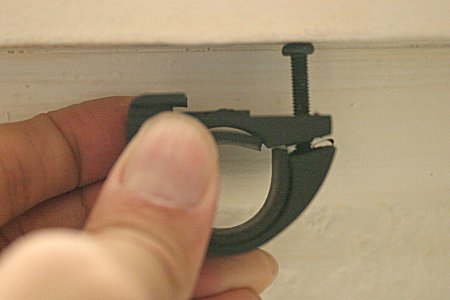
|
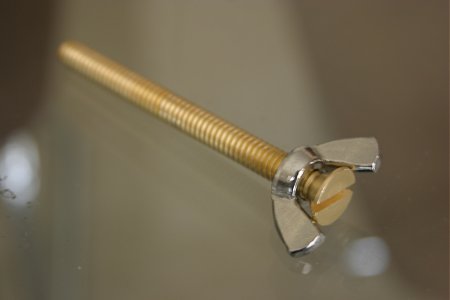
Next, take a 1/4"-20 wing nut and screw it on to the 1/4"-20 bolt, the wings should face the bolt head, until it comes to a stop as shown in the picture below. Use some super glue to fix the wing nut permanently to the bolt. This would allow you to tighten the bolt by hand without a screwdriver. And by putting the wing nut under the bolt head, instead of over, you can still use a flat-head screwdriver to tighten it if you wish.
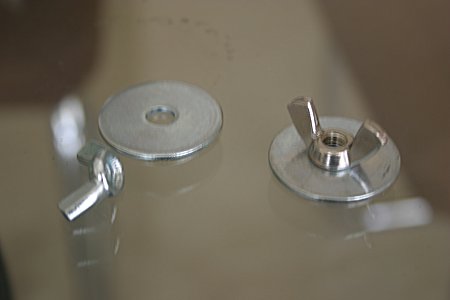
Take two wing nuts, two 1/4" washers, and some super glue to make the rest of the fasteners. Line the bottom side of each wing nut with super glue and place each wing nut over the center hole of each washer (see pictures below). One of these pair will be used for tightening the bike camera mount. The other will be used as the tripod head. The washers have larger surface area, so it will help with weight distribution under the camera.
After the super glue has dried, slip the 1/4" bolt through the plastic bike mount (see picture below). If it does not slip through easily, use the 1/4" drill bit to enlarge the hole. The hole should be big enough for the bolt to easily slip through, but not so loose that the bolt has a lot of room to play.
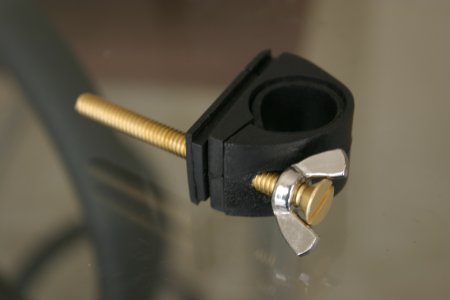
With the bolt through the hole on the bike mount, screw one of the wing nut and washer onto the bolt as shown in picture below. The washer should be closer to the plastic mount than the wing nut.
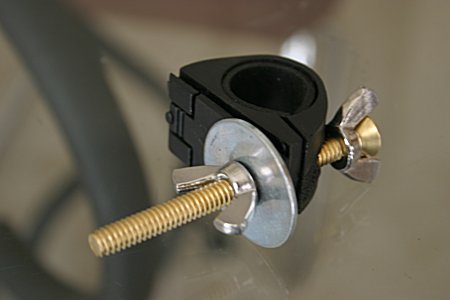
Now, screw the other wing nut and washer onto the bolt in reverse (see picture below). Reverse meaning that the wing nut is closer to the plastic bike mount. There should be enough bolt thread left for your camera or camcorder. If not, then you'll need to use a longer bolt. Test the length by screwing the bolt into the tripod socket of your camera. When the bolt comes to a stop, there should be a little bit of thread between the bottom of the camera and the washer. Tighten the attachment by screwing the wing nut until the washer is flush with the camera body.
|
Make a SpyCam Mount Like this article? Check out the Hacking Digital Cameras book. Chapter 19 of the book is titled, "Building a SpyCam Mount for Your Bicycle". It guides you through making a simpler bicycler mount than the one in this article. In addition, it presents a thorough discussion of using a wireless video camera and an Archos MPEG-4 AV400 200 GB Pocket Video Recorder to memorialize your journey. Setting it up is a lot easier than you think. |
|
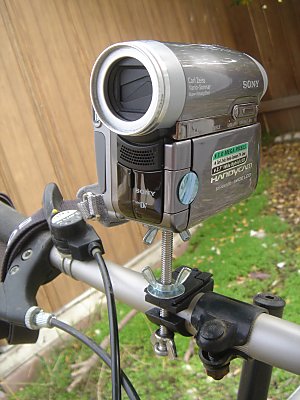
Attaching to the Bicycle
To attach the mount to your bicycle, unscrew both wing nut and washer sets from the bolt. Remove the bolt from the plastic mount. Wrap the plastic mount around the handle bar on your bike, or any other tubular section. Insert the bolt through the plastic mount and fasten the mount to the bike tightly with one of the wing nut and washer set. Screw the other set onto the bolt in reverse. Attach the camera to the bolt. Tighten the camera onto the mount with the wing nut and washer set. Now you are ready to go shoot some great bike photos and videos.
The nice thing about this bicycle camera mount is that it only cost a few bucks to make. And if I have to leave it behind on my Hawaiian trip, I would only be sad by the fact that I left one of my projects behind, not due to the cost of making it. If you have several bikes, you can easily afford to make one for each of your bikes and never have to move the mount from one bike to another.
Tips
It's hard to shoot photos from a moving bike, especially if you mount the camera elsewhere than the handlebar. But you can make your life easier by wiring up a remote trigger to your camera and place the remote close to your hand on the handlebar. See other articles on this web site for remote triggers.
It's a little easier to shoot videos on your bike. Just press the record button and hop on. Enjoy the ride and let the camcorder recorder on its own. Stop the recording when you arrive at your destination. You'll find that your ride is more enjoyable when you are not worried about what the video camera is seeing. Plus, you'll further reduce your chance of getting into a bicycling accident.
The bicycle vibrates a lot. Be sure to tighten the mount as much as possible to prevent movement from vibration.
Related Links
- Bicycle Mounted Steady Cam
- Bogen-Manfrotto Micro Ball Head #482 - Amazon User Reviews
- CatEye Bike Head Light HL-500II - Amazon User Reviews
- CatEye Bike Head Light HL-EL200 - Amazon User Reviews
- CatEye Bike Head Light HL-EL300 - Amazon User Reviews
- CatEye Bike Head Light HL-MC200 - Amazon User Reviews
- DIY: Bicycle - Steady Cam - mount
- DIY bottlecap bicycle camera mount
- DIY Bottle Cap Tripod
- How I Built a Composite Bike in my Garage
- How I Made My Carbon Frame At Home
- Make A Handlebar Camera Mount For Under One Dollar!
- MAKE: Blog: HOW TO - Build a bicycle camera mount
- My Camera Mounts for Bicycle Handlebar
- Tricking out the Bike IV: Camera Mount
- Video How-To - Includes making a camera mount for a bicycle helmet.
153 Users Online
|
Get Our
$10000-above $5000-$9999 $2000-$4999 $1000-$1999 $500-$999 $200-$499 $100-$199 $50-$99 $25-$49 $0-$24 Gift Certificate 
|
|