

![]() Attach
|
Attach
|
![]() Edit
|
Edit
|
![]() Revisions
Revisions
![]() Related Content
Related Content
Akaso Brave 7 LE Review
The Akaso Brave 7 LE is making waves in the action camera market, and for good reason. With its unique dual-screen design, it aims to cater not only to adrenaline junkies but also to vloggers and content creators. Let's dive into the details and find out if this budget-friendly camera lives up to the hype.
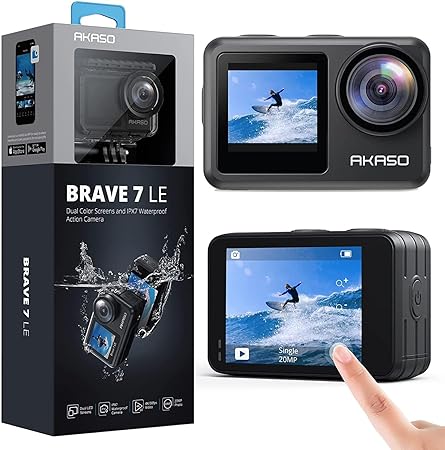
In the Box

The Akaso Brave 7 LE comes in a elongated package shown in the photo above. It is showcased in a hard transparent plastic case. The action cam is enclosed within the underwater case, which is attached to GoPro-like mounting system.
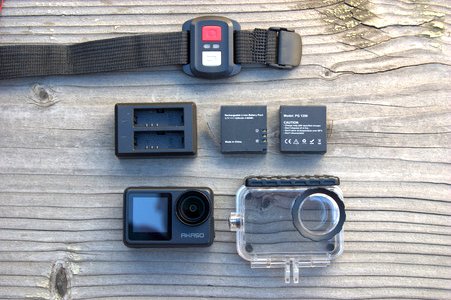
Taking the package apart reveals all the parts that comes with it:
- Assorted GoPro-Like Mount
- Dual Battery Charger
- Remote Control
- Two PG 1350 Rechargeable Li-ion Battery Packs
- USB Charging Cable
- Underwater Case

The accessory package is generous, featuring mounts for handlebars, helmets, and more. The accessory package content is not shown in the photograph above, because I wrote this article a year after getting the action cam. The inclusion of two 1,350mAh batteries means you'll get twice the amount of recording time before running out of juice on your adventures.
Design and Build
The Brave 7 LE immediately stands out with its compact form factor and thoughtful features. It weighs only 75g, making it easy to use one-handed and carry in your pocket or bag.
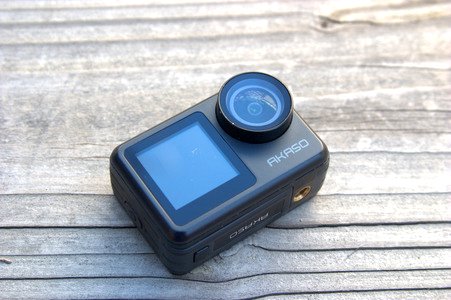
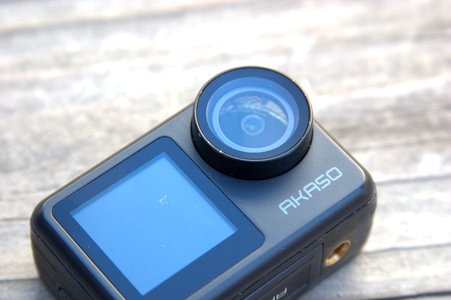
The large circular lens protrudes from the front top right of the action cam. It doesn't come with a lens cover as it's obvious Akaso intend for you to store the action cam in the underwater case when not in use. But in the field, I've found that I do not carry the underwater case when the adventure doesn't involve water. And I'd rather keep the action cam mounted to my gear--DSLR, tripod, bike, etc.--so a lens cap is more handy than the case. Luckily, EveryThang3D (a 3D printing consumer product brand) makes such a thing.
The Akaso Brave 7 LE has a IPX7 water-resistant design that can protect itself from rain, snow and water splashing. But the action cam is not waterproof. Instead, it comes with a rubber sealed waterproof housing that lets your underwater adventure go down to 131FT/40M. We'll get into more details regarding the underwater casing in a later section below.
Tripod Mount
The bottom of the Akaso Brave 7 LE has a standard tripod screw mount (see photo below). It's aligned to the lens axis, so that you can rotate the tripod along the axis.

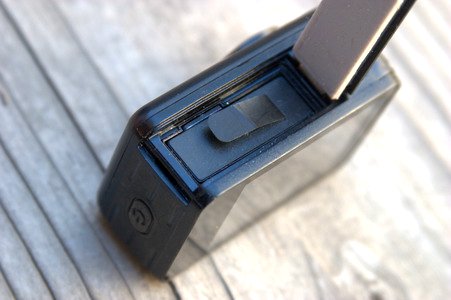
Battery and Storage Bay
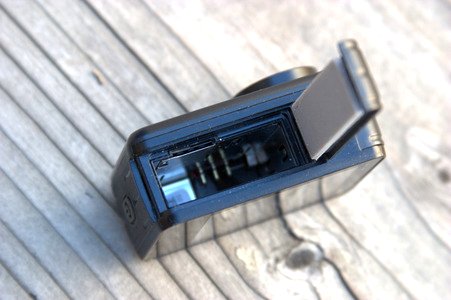
Next to the tripod mount is a sliding panel. When you open it, it reveals the battery bay and the microSD card slot (see photo below).
The photo below shows the battery and the storage card installed. The battery can be removed by tugging the soft cloth puller. The microSD card is retained by a spring lock. So when you click to release it, be ready for it to spring out at you.

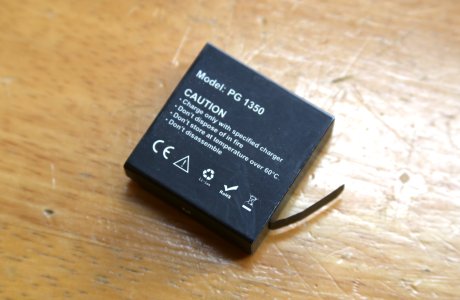
The Akaso Brave 7 LE uses PG 1350 battery pack. It is a lithium ion battery pack that provides 3.7 volts of DC power and has a capacity of 1350 mAh; hence the model number. It is equivalent to 4.995 watt/hour.
Cross-Reference
The PG 1350 battery pack is used by quite a few other action cams. If you already have those action cams, you may be able to share battery packs among devices. See "PG 1350 Rechargeable Li-ion Battery Pack Compatibility" page, which includes the battery dimension, pin-out, and charger specification.
During practical use, I let it record continuously until the action cam shut down. Reviewing the recorded videos, the action cam lasted 2 hours and 11 minutes. Not bad, but you'll want to set a timer to switch batteries if you want to record longer than that.
Battery Charger
The Akaso Brave 7 LE comes with the SX-50-F01 dual port battery charger. It's really handy, because it can charge two battery packs at the same time. The photo below shows the top of the charger.
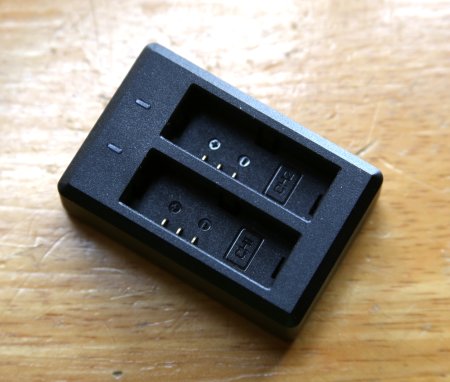
There is a LED indicator for each of the battery slots. When it is blue, it means that the battery are charged or no battery is in the slot. When a depleted battery pack is plugged in, the indicator turns yellow to indicate charging.
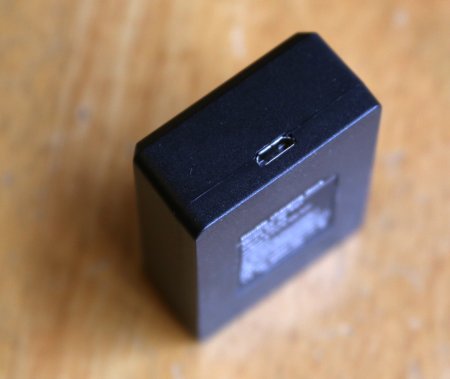
The battery charger has a standard microUSB port. That means you can use any standard microUSB cable to power the charger either with your computer's USB port or your USB AC adapter.
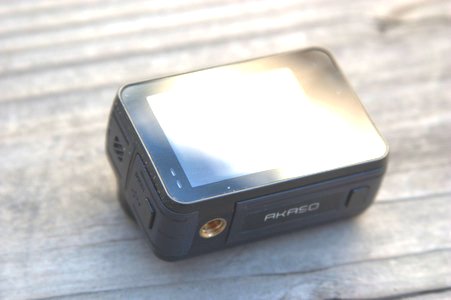
Controls
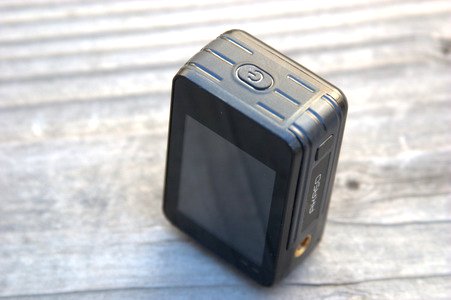
When you look at the action cam from the back, the power button is on the right side as shown in the photo below. Hold the power button down for two seconds turns the action cam on. The same action turns it off.
The top has two buttons: 1) the mode switch on the left; and 2) the shutter button on the right. There are five modes to this action cam: 1) Video; 2) Photo; 3) Playback; 4) Video Setup; and 5) Photo Setup.
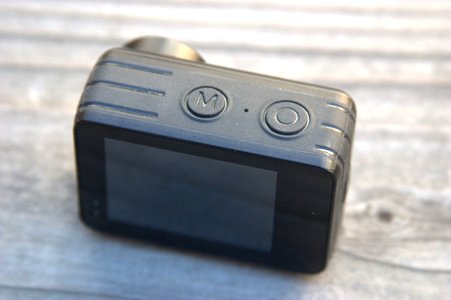
To capture video, push the shutter button in the video mode. To take a photo, push the shutter button in the photo mode.
At first, it seems like it's very inefficient to use the mode button to switch into the "Video Setup" and "Photo Setup" modes, considering that it's a lot easier to do on the touch screen. But then I realized it's for changing settings inside the underwater case where you can't access the touch screen. I'll cover the button operations in later sections.
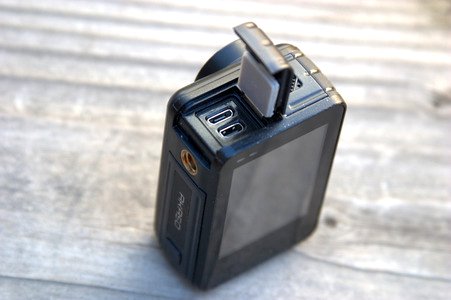
Ports
There is a small slide panel on the left side of the action cam. There are two ports under the slide panel as shown in the photo below.

The port on the left is a micro-USB port. You are suppose to be able to plug an external USB microphone to it. But doing a quick search on Amazon, I could not find any external microphone for micro-USB. There is an Akaso external microphone with a Type-C USB for Brave 6 Plus, Brave 7, and Brave 8 action cam (see "Related Links" section below). The listing description says it's not compatible with Brave 7 LE. I'm not sure if it will work with the Brave 7 LE using an micro-USB adapter.
The port on the right is a micro-HDMI port. You can use a micro-HDMI to HDMI cable to connect the action cam to a TV or a monitor.
Dual Screen
The Brave 7 LE boasts two screens: one on the back and another on the front. The rear screen is a 2-inch touch display, which makes navigating settings and options intuitive. The touchscreen is responsive and easy to read, even in bright sunlight.

The touch screen is a real joy to use when it comes to setting functions on the action cam. There is a gear button on the bottom right corner of the screen for each mode. When you tap that gear in video mode, you go into the video settings. Same for the photo mode. Then you can scroll up and down the menu intuitively with gestures.
There is also digital zoom function buttons on the right side of the screen. The action cam shows the current resolution and frame rate. Tapping it gives you a menu of special functions. In video mode, the menu presents: 1) Normal; 2) Loop Record; 3) TimeLapse; 4) SlowMotion; 5) FastMotion; 6) Wi-Fi. In photo mode, it has: 1) Single; 2) Burst; 3) TimeLapse; 4) Self-Timer; 5) Long Exposure; 6) Wi-Fi.
The real standout, compared to many other action cameras on the market, is the tiny front-mounted screen. The front-facing screen is narrower than the rear screen, but is quite useful for vlogging or taking selfies. Although it doesn't display the full scene, it helps you frame your shot and check exposure while recording. The front screen is practically a must for travel vloggers and content creators who need to monitor their shots while in front of the camera.
Underwater Capability
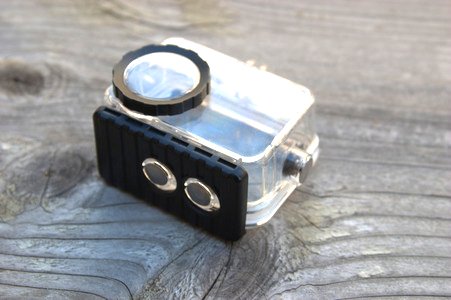
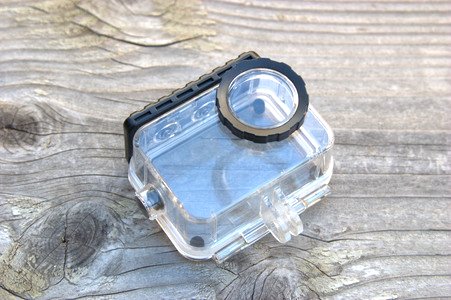
In order to be waterproof for deeper dives and rough adventures, an underwater case is provided with the action cam. Unlike the action cam, it uses GoPro mount rather than tripod mount (see photo below). Luckily a while package of tripod and GoPro adapters are included.

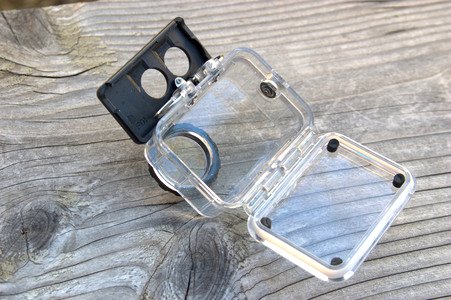
The underwater case comes with three buttons that replicates the three buttons on the action cam (see photo below). Unfortunately, you lose the touch screen functionality while the action cam is in this case. But the good news is that Akaso allows you to change setting using the three buttons on the case.
To get into the video settings, you use the mode button to switch to VideoSetup. Then press the shutter button to activate the menu. Once you are in the menu, use the power button to toggle between selections. Use the shutter button select. Same is true for photo settings. It's not as easy to navigate as the touch screen, but at least you can change settings under water.
The photo below shows the underwater case when it's open. A rubber seal surrounds the opening to prevent water from getting in. I've used this set-up in Hawaii in the sea. Not one bit of water seeped into the case.

Performance
The camera records in 4K resolution at 30fps, providing sharp and detailed footage. While it may not match the latest 4K at 60 fps video capabilities of some competitors, it is more than sufficient for most users and vloggers. However, if you're chasing the ultimate in frame rates, you'll find faster options elsewhere.
Additionally, it boasts a 20MP sensor for capturing still images. Photos are limited to being stored in JPG format; not RAW format.
Cross-Reference
The Akaso Brave 7 LE has a bug that disables audio recording if you turn off the "Boot-up" sound setting. Therefore, you should keep that setting on (default) if you want audio recording. See "Akaso Brave 7 LE Doesn't Record Sound" page for more details.
Image Stabilization
Where the Brave 7 LE truly shines is in its 6-axis stabilization, ensuring smooth footage across all resolutions. I noticed that when the image stabilization function is turned off, the action cam has a wider field-of-view. That makes me think this action cam uses digital image stabilization rather then optical image stabilization. It basically sacrifices edge pixels to stabilize the image.
I do find the image stabilization extremely useful, so I keep it on at all times. It's even useful when the action cam is mounted on a tripod. Because it's a small lightweight action cam, I usually pair it with a selfie stick that has tripod feet. The selfie sticks are not very stable, which the image stabilization easily takes care of.
Field-of-Views
The Akaso Brave 7 LE allows you to change the field-of-view (FOV) with four different modes, it calls "Angle". To change it, you tap the gear button on the bottom right of the touch screen, then the gear tab, and select "Angle". The four angles are "Super Wide", "Wide", "Medium", and "Narrow".
I found the ability to switch FOV on the fly is extremely useful when I was recording my son's volleyball games. We started in a large gym with two courts, so I needed the Narrow angle to get closer to the action. When we moved to a small gym with a single court, the Super Wide angle was necessary to capture the entire scene. I appreciated the ability to switch between the Super Wide angle and the narrow quickly.
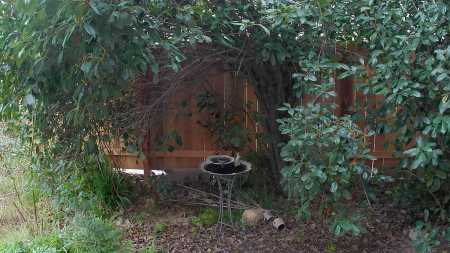
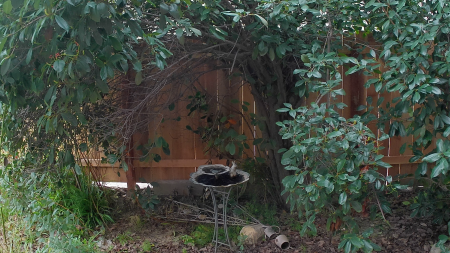
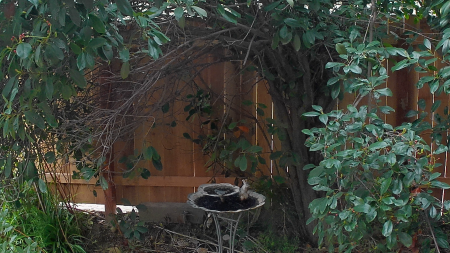
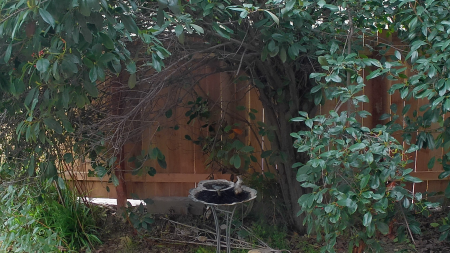
Below, we provide greater details of each FOV. Each image in its respective section demonstrates the FOV of that mode. Each image is from a full-resolution video shot with the FOV. The bird bath is 10 feet away from the action cam.
Super Wide
The Super Wide mode captures an expansive view, allowing you to fit more into the frame. It's ideal for landscape shots, group photos, and capturing wide vistas. The 170 degrees field of view ensures you don't miss any details.
Wide
The wide-angle mode provides a slightly narrower view than super wide. It strikes a balance between capturing a broad scene and maintaining some perspective. Great for general photography and capturing action shots.
Medium
In the medium angle mode, the field of view is narrower than wide angle. It's useful for focusing on specific subjects or scenes without distortion. Medium angle works well for portraits, street photography, and close-ups.

Narrow
The narrow angle mode provides the tightest view. It minimizes distortion and emphasizes details. Use it for macro shots, capturing distant subjects, or when you need precision.
Filter Thread
The Akaso Brave 7 LE has no filter thread in front of its lens. So if you are thinking of shooting special effect videos and photos with this bullet cam, then you are out of luck. Only special effects you can apply will have to be in post-processing on your computer.

On the other hand, EveryThang3D comes to the rescue once again. EveryThang3D makes assorted filter and lens adapter for the Akaso Brave 7 LE and probably many other cameras as well. Using its adapters, you can mount filters and lenses onto the Akaso Brave 7 LE for many effects.
I do have the EveryThang3D Digital High Definition 2X Telephoto Lens and Akaso Brave 7 LE adapter. But I'll save that for another review article.
Remote Control
The Akaso Brave 7 LE comes with a handy remote control that looks like a wrist watch. But that's not the only way you can remote control it. You can also download the Akaso Go app on your Android phone from the Google Play Store to control the action cam.
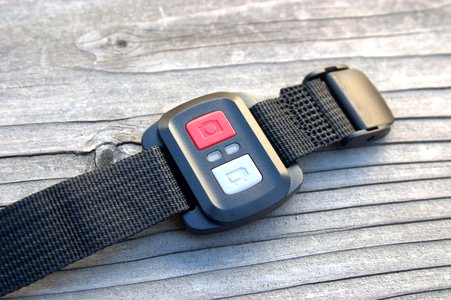
Wrist Strap Remote Control
The package includes a wrist-watch remote that allows you to control the camera from a distance. Whether you're capturing epic mountain biking trails or kayaking adventures, this wrist strap ensures easy access to essential functions: 1) start/stop video recording; and 2) snap photographs. Pressing either button switch the action camera to the respective mode and starts recording instantaneously. This combined behavior is so much easier than switching modes on the action cam and then pushing the shutter button.

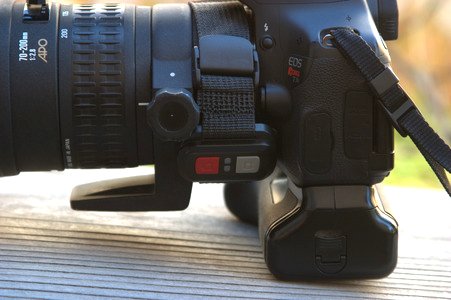
This remote control is so handy, I use it more often than the shutter button on the action cam. I mount the Akaso Brave 7 LE action cam toward the front of my Canon EOS T3i DSLR via a Pictinny hot shoe rail and a Picatinny to tripod adapter (both from EveryThang3D). I then strap the remote to my telephoto lens. In this configuration, I use the thumb to trigger then video recording and the photo snapping on the remote. It's much more convenient than to try using the shutter button at the front of the rig.
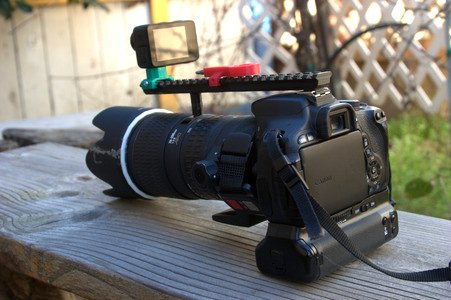
The following photo shows a close-up of how the remote control is strapped to the Sigma 70-200mm f/2.8 EX APO HSM telephoto zoom lens.

Similarly, when the action cam is mounted to a hand grip, I strap the remote around the top of the hand grip to activate it with my thumb. The remote control is design to fit the size of a wrist, so a thicker handle, like the one shown below, works better.

I only wish the remote control would work with the action cam further away. In my experience, the remote can only activate the action cam when it is less than 5 feet away. There is also no indication, unless you are looking at the rear display, that recording has started nor photograph was shot.
I didn't realize this distance limitation on my Hawaii trip. At one of the destinations, we wanted a group photo. So I sat the camera up about 10 feet away and just pressed the remote control many times. Later, I found out that none of the photos were taken.
Akaso Go App Integration
Alternatively, you can control the Brave 7 LE remotely using the companion app. The app provides additional features beyond basic remote control, such as adjusting settings, reviewing footage, and managing files.
Related Links
- 1350mAh Battery (3 Pack) with 2-Channel Charger for AKASO Brave 7 LE, Victure AC940/AC960, XTU S3, WOLFANG GA400/GA420, Campark V40
- Amazon User Reviews
- Akaso Brave 7 LE
- Amazon User Reviews
- AKASO External Microphone Brave 7/ Brave 8/ Brave 6 Plus Action Camera Only (Type-C Port)
- Amazon User Reviews
- Highwings 4K Micro HDMI to HDMI Cable (10 FT)
- Amazon User Reviews
- Togconn USB Type-C (Female) to Micro-USB (Male) Adapters (2-Pack)
- Amazon User Reviews
![]() Attach
|
Attach
|
![]() Edit
|
Edit
|
![]() Revisions
Revisions
![]() Related Content
Related Content
Attachments
- Action Cam and DSLR Combo (Small).jpeg (36 KB)
- Action Cam on Handle (Small).jpeg (36 KB)
- Akaso Brave 7 LE Packaging.jpg (34 KB)
- Bay (Small).jpeg (24 KB)
- Bottom (Small).jpeg (23 KB)
- Content (Small).jpeg (40 KB)
- Empty Bay (Small).jpeg (27 KB)
- Front (Small).jpeg (36 KB)
- Lens Close-Up (Small).jpeg (23 KB)
- Lens Close-Up (Thumbnail).jpeg (4 KB)
- Medium Angle of View (Small).png (239 KB)
- Narrow Angle of View (Small).png (238 KB)
- Ports (Small).jpeg (22 KB)
- Power Button (Small).jpeg (22 KB)
- Rear (Small).jpeg (17 KB)
- Remote Control (Small).jpeg (44 KB)
- Remote Strapped to Lens (Small).jpeg (29 KB)
- Super Wide Angle of View (Small).png (250 KB)
- Top (Small).jpeg (19 KB)
- Underwater Case Buttons (Small).jpeg (28 KB)
- Underwater Case Open (Small).jpeg (45 KB)
- Underwater Case with GoPro Mount (Small).jpeg (42 KB)
- Wide Angle of View (Small).png (244 KB)
523 Users Online
|
Get Our
$10000-above $5000-$9999 $2000-$4999 $1000-$1999 $500-$999 $200-$499 $100-$199 $50-$99 $25-$49 $0-$24 Gift Certificate 
|
|


