

![]() Attach
|
Attach
|
![]() Edit
|
Edit
|
![]() Revisions
Revisions
![]() Related Content
Related Content
How to Add Location to Your Photos with Geotag
In the previous two installment of this series of geotagging articles, we show you How to Use GPSLogger to Track Photo Locations and how to Set Up GeoTag to Add Location to Your Photos. In this article, we are going to continue down the path of getting your computer to automatically geotag your photos based on the GPS log you have gathered.
Launching Geotag either online or offline has already been explained in the previous installment, so we will not go through that here. Instead, we will jump right into loading your photos and geotagging them.
Note
This article is currently written for Windows users. In the future, we may expand this article for Mac users or write a separate article explicitly for Mac users.
Loading Your Photographs
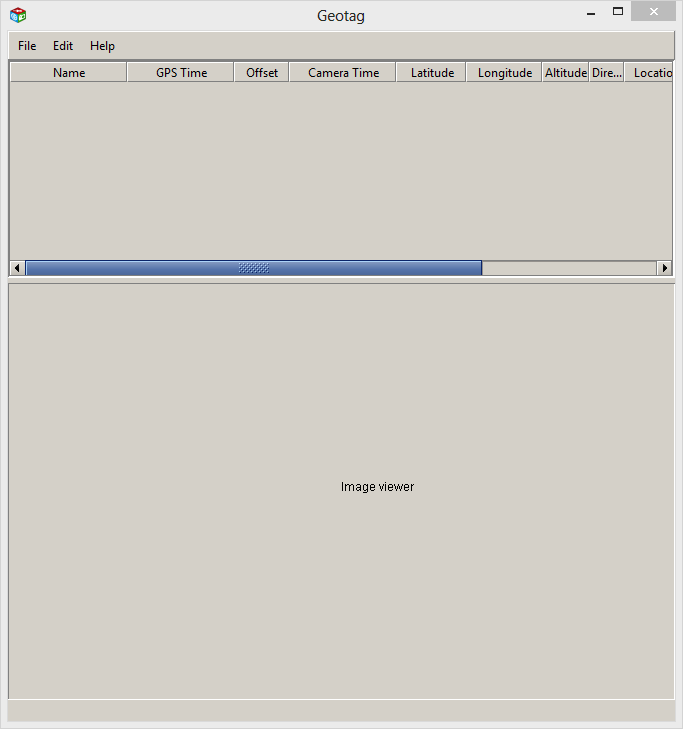
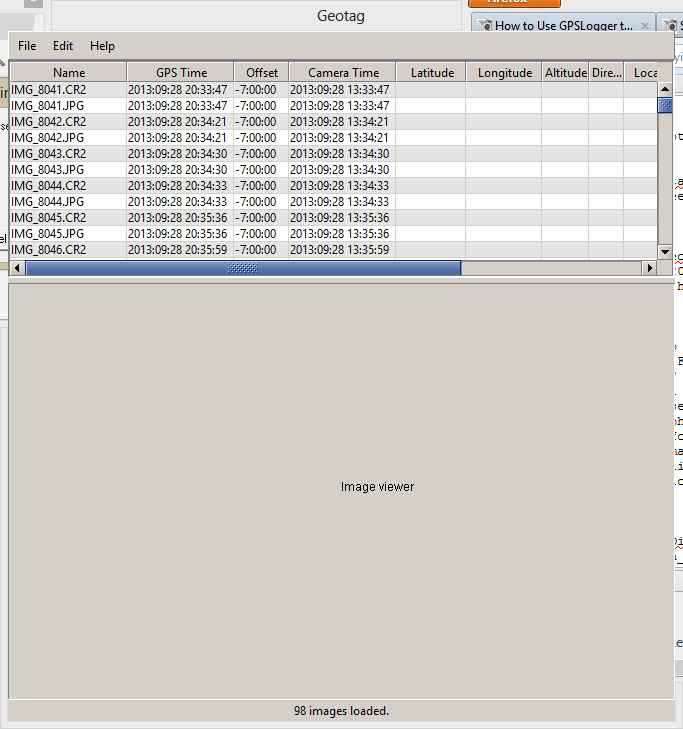
After launching Geotag, you will be at the main user interface screen (see screen shot below).
The next thing to do is to load the photographs that you want to geotag. From the main user interface, pull down the "File" menu. Select "Add images from directory..." You'll be presented with a directory selection dialog. Use it to navigate to the folder that contains your photographs. Once you have navigated into the folder, click the "Open" button to add all of the images to Geotag. The screen shot below shows that a list of images have been added. Note that the locations for the images are unknown.

Loading GPS Locations
After you have added your photographs to Geotag, it's time to load the GPS locations. In the first installment, we explained how to use GPSLogger to track photo location in a GPX file. Then we explained how to e-mail that GPX file to yourself. Now, it's time to download the GPX file from your mail to your computer's desktop (or a more appropriate location), so that Geotag can load it.
When you have downloaded the GPX file to your computer, pull down the "File" menu on Geotag and select "Load tracks from file..." You'll be presented with the open file dialog. Use it to navigate to the GPX file. If Geotag is able to read the GPX file, it will show you the number of locations loaded at its bottom status bar (see screen shot below).

Find Locations of Photographs
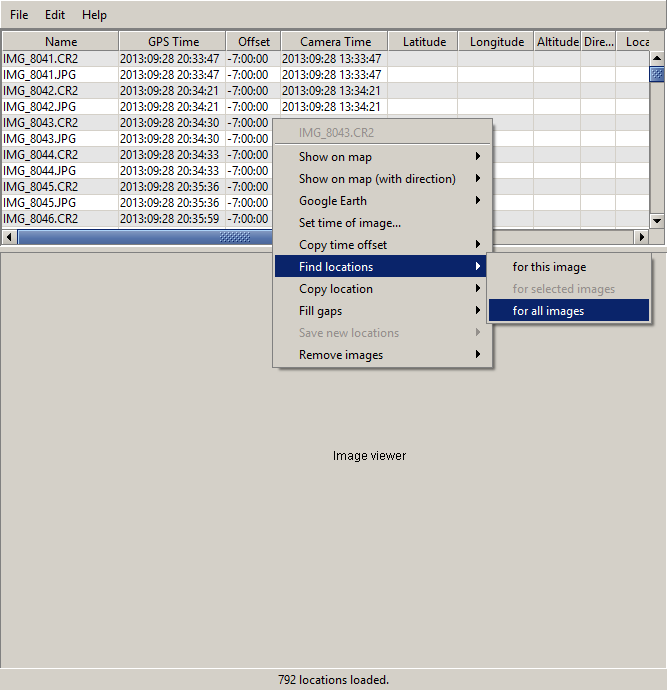
Now it's time to let Geotag do its work for you. Right click on the list of images that are added to Geotag. From the pop-up menu, select "Find locations". Then select "for all images" as shown in screen shot below.

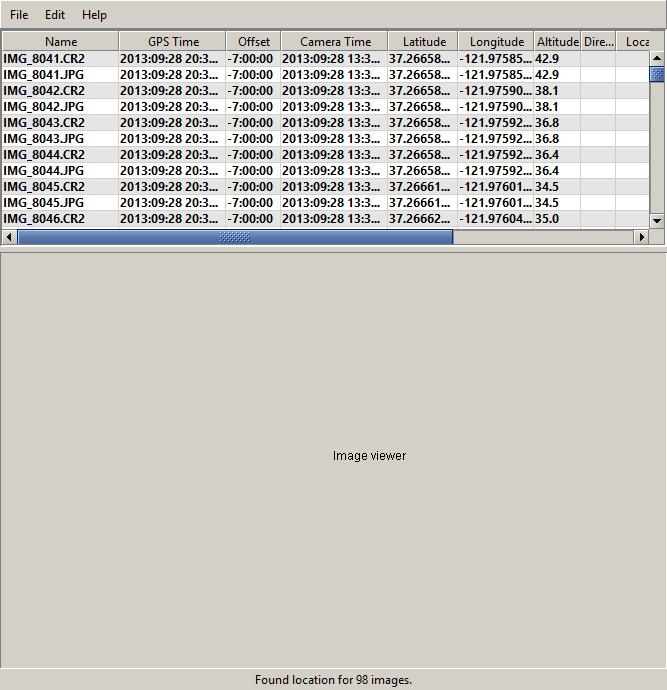
Viola! Notice that Geotag has found the GPS coordinate (latitude, longitude, and altitude) of each photograph. The screen shot below demonstrates this effect. All of the images are highlight in bold, meaning the location data haven't been saved.

Save Locations into Photographs
After the locations for the photographs have been found, it's time to save the coordinates into the images. Right click on the list of images again to bring up the pop-up menu. This time, select "Save new locations" and "All images". The screen shot below demonstrates the pop-up menu choices.
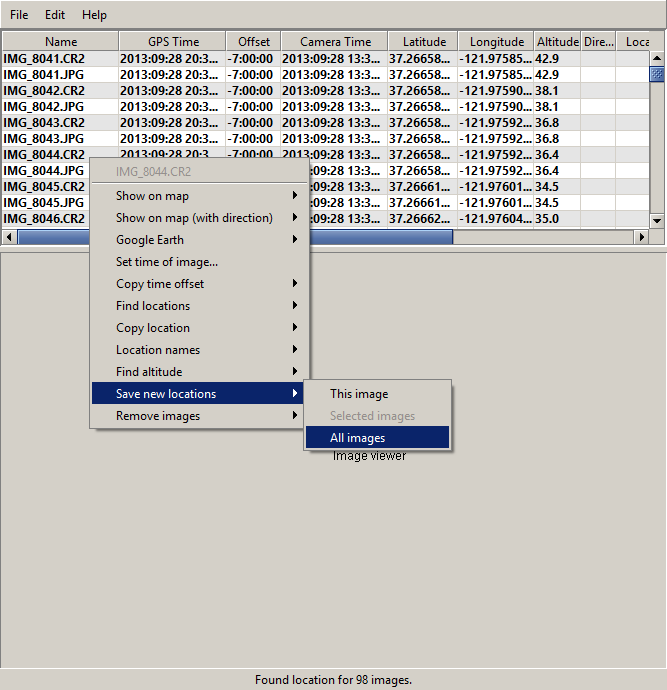
After making that choice, Geotag will attempt to save each image. As it does so, it removes the highlight on the image list to indicate the images has been saved. A progress bar at the bottom of the screen gives you an idea of how long it will take to save all images.
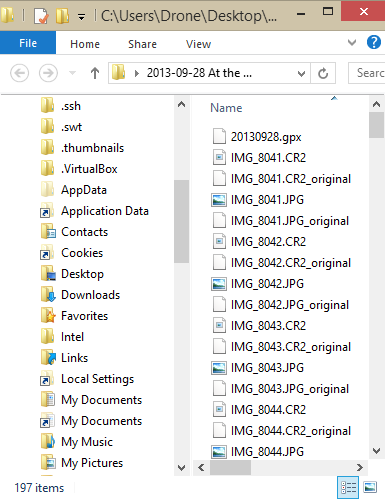
When it's done, you'll have an additional file for each image. The old file, without the GPS coordinate, will be renamed with the "_original" suffix. See the following File Explorer screen shot for example.

The new file with the GPS coordinate is now ready for upload to Instagram or other services that could make good use of the GPS information.
Related Links
![]() Attach
|
Attach
|
![]() Edit
|
Edit
|
![]() Revisions
Revisions
![]() Related Content
Related Content
Attachments
- 792 locations loaded.png (30 KB)
- Backup Files.png (34 KB)
- Find locations for all images.png (35 KB)
- Found location for 98 images.png (28 KB)
- Images Added to Geotag.png (30 KB)
- Save new locations for All images.png (39 KB)
- thumbnail.png (3 KB)
347 Users Online
|
Get Our
$10000-above $5000-$9999 $2000-$4999 $1000-$1999 $500-$999 $200-$499 $100-$199 $50-$99 $25-$49 $0-$24 Gift Certificate 
|
|


