![]() Attach
|
Attach
|
![]() Edit
|
Edit
|
![]() Revisions
Revisions
![]() Related Content
Related Content
Night Detective Quest 5 (ND-Q5) Night Vision Monocular Review
Sony Handycam was the first photographic device that got me into the world of night vision. With it, I was able to shoot videos of scene at night, lit by ambient light. Using the optional IR illumination, I was able to capture scenes in complete darkness. Back then, I had caught numerous photos of my dwarf hamster in action. That was when I realized that there was a whole new world in the darkness of the night.
Now wouldn't it be nice if you can capture the same night scenes with your digital SLR camera? I proceeded to find the Night Detective Quest 5 (ND-Q5) night vision monocular just north of $175 (see photo below). It is a generation 1 image intensifier (see "Imager intensifier" in "Related Links" section below). A photo adapter allows you to attach it to your digital SLR camera. We will talk about this adapter later on. For now, we will focus on the review of the ND-Q5 night vision monocular.
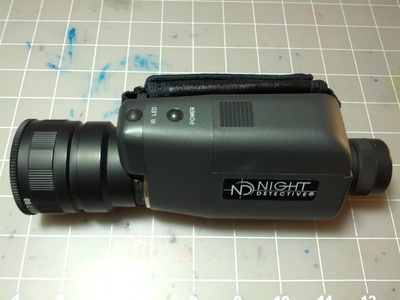
The Night Detective Quest 5 arrives in a plain, but sturdy white box. Inside the cardboard box is a very nice zipper pouch for carrying the monocular.
At first glance, the Night Detective Quest 5 looks like a miniature old-school camcorder. It's got a big lens on one end and a smaller eyepiece on the other end. On the right side of its body is a hand strap. You hold it just like an old-school camcorder.
It comes with a 52mm pinhole lens cap. This lens cap allows you to test the night vision monocular in daylight without damaging the night vision elements. However, it is a screw-on, so it's difficult to attach or remove. But I guess that's a good thing, considering if it falls off during daylight, you'd have a damaged night vision monocular.

Luckily, it's 52mm thread, so you can use a 52mm snap-on lens cap if you want. The photo above shows the Canon snap-on lens cap on the left and the pinhole screw-on lens cap on the right.
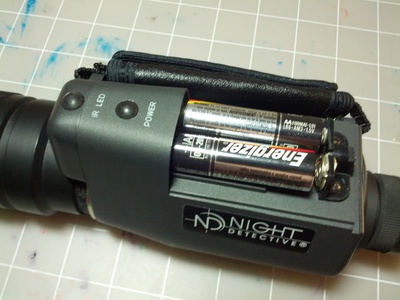
There are two control on top of the monocular. The one labeled "IR LED" turns on infrared LED lights to light up the scene. The second buttons is the "Power" button.
Behind the control buttons is the battery bay. You slide it open to insert two AA alkaline batteries (see photo below).
The front lens element looks like a simple plain glass without any coatings (see photo below). It has a 52 millimeter filter ring. The monocular comes with pinhole lens cap that screws onto the 52mm filter ring. The pinhole lens cap allows you to try the night vision monocular during the day or with the lights on.
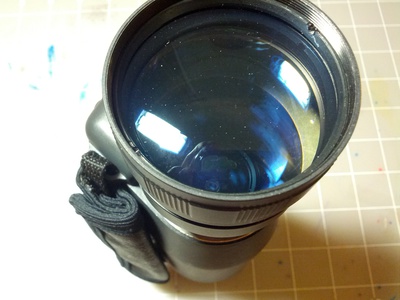
The front lens element is rotatable by hand. It allows you to change the focus on various distances.
The rear eyepiece allows you to see the night scene through the monocular. It's rotatable, allowing you to change the focus distance for your eyes. Because both front lens element and the eyepiece have adjust focus, it may take some time to get a clear picture. But once you do, it's amazing what you can see under moonlight.
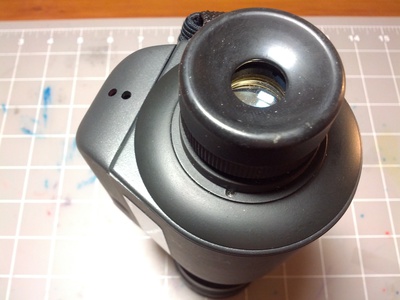
Above the eyepiece are two LED indicators. The lower indication shows the power status (whether the device is on or off. The higher indication shows whether the IR LED is on or off.
Night Detective 42mm Photo Adapter for Night Vision Devices
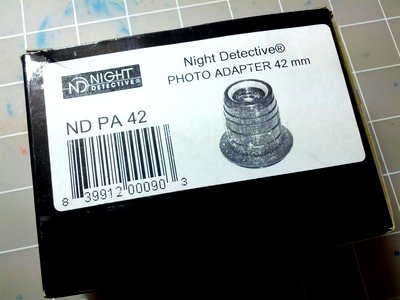
What's most interesting to us is how to take night vision photographs with the Night Detective Quest 5 ND-Q5 Night Vision Monocular. The answer is that you'll need a SLR camera, the Night Detective 42mm Photo Adapter, and a T-mount adapter for your SLR camera. The photo below shows packaging for the Night Detective 42mm Photo adapter.
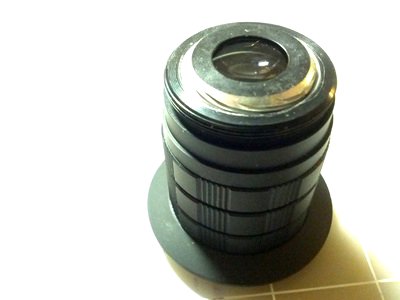
The Night Detective 42mm Photo Adapter takes the place of the eyepiece on the Night Detective Quest 5. So to use it, you simply unscrew the eyepiece on the Quest 5, then screw the photo adapter onto the night vision monocular. The photo below shows the photo adapter and the end that screws onto the monocular.
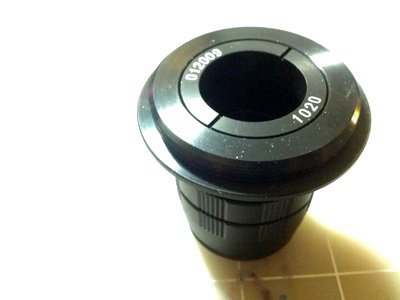
The following photo shows the photo adapter end that screws onto the T-mount adapter.
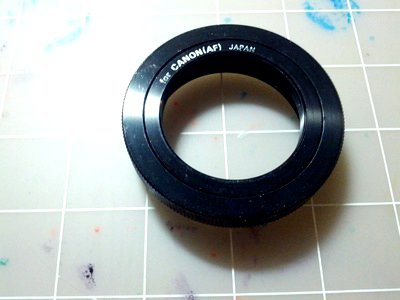
The T-mount adapter is an universal SLR camera adapter that allows you to attach various lenses onto your SLR camera. There is a T-mount adapter for every SLR camera brand out there. The following photo shows a T-mount adapter for Canon EF SLR cameras.
You simply screw the Night Detective 42mm Photo Adapter onto the T-mount adapter, then mount the T-mount adapter onto your SLR camera. Then you are all ready to shoot some night vision photographs.
Related Links
- Image intensifier - Wikipedia
- Mounting Night Vision Monocular to an Airsoft Rifle
- NightDetective Quest 3M 3x Magnification Gen 1 Night Vision Monocular w/ IR, Blue ND-Q3M
- Amazon User Reviews
- Night Detective 5x NightVision System with IR PRO Quest 5m Series ND-Q5M
- Amazon User Reviews
- Night vision - Wikipedia
![]() Attach
|
Attach
|
![]() Edit
|
Edit
|
![]() Revisions
Revisions
![]() Related Content
Related Content
Attachments
- Battery Source (Small).jpg (50 KB)
- Controls (Small).jpg (43 KB)
- Front Lens Element (Small).jpg (45 KB)
- Photo Adapter (Night Detective End) (Small).jpg (19 KB)
- Photo Adapter (T-Mount End) (Small).jpg (18 KB)
- Photo Adapter Box (Small).jpg (30 KB)
- Rear Indicators (Small).jpg (46 KB)
- T-Mount Adapter (Small).jpg (24 KB)
- thumbnail.jpg (7 KB)
428 Users Online
|
$10000-above $5000-$9999 $2000-$4999 $1000-$1999 $500-$999 $200-$499 $100-$199 $50-$99 $25-$49 $0-$24 Gift Certificate |
|


